This sauce can be made very thick for homemade macaroni and cheese or thinner for blending with rich or broccoli. The below recipe, as is, is fairly heavy. By adding more milk, you can reduce the sauce.
Bierock
The first time I tried these was when my Aunt Debi made them and wow, they were so good. These are a Slavik meat pie and there are a lot of variants of this meal. These are popular throughout the Balkan regions, midwestern US and northern European countries. You can find this made with flaky phyllo dough, puffed pastry dough, biscuit style dough or even wrapped and fried like an egg roll. Depending on the region fillings vary from spinach to carrots to cabbage to potatoes and for meats you’ll find almost any type of ground meat.
I tend to follow my aunt’s recipe except I add potatoes as well and reduce the cabbage as my kids are not big fans of cooked cabbage, and they won’t touch sauerkraut, which is what my grandmother would use. The nice thing about bierocks is that they can be stored and reheated very easily; if frozen they keep for a good while as well. And they really are easy to make!
Taurtellini
Tortellini originated from the Bologna region of Italy and the story is that the goddess Venus had a night on the town and had to stay in an inn of the mortal world. The innkeeper couldn’t resist the temptation to see the goddess of beauty and love so he snuck a peek through the keyhole. All he could see was her belly button and to immortalize what he had seen, he rushed to the kitchen and created the tortellini. To use homemade tortellini, use my recipe. You can also purchase premade tortellini in the frozen section of your grocery.
I decided to bring together the beef and cream sauce because most generally people save cream sauces for poultry and I enjoyed mixing it up a bit with beef or sausage. This dish is a very simple and is very rich and flavourful. The key is slow cooking the beef so that it stays tender and moist, like you would expect in a beef stew. I try to pick beef that has minimal marbling to reduce the chewiness.
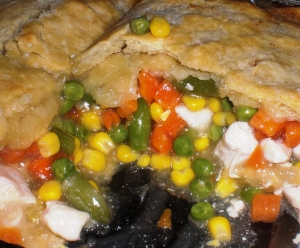
Chicken Pot Pie
In Florida there aren’t a lot of chilly days to warrant curling up with a warming pot pie to heat your insides, but when I make them, I can almost picture a lawn filled with snow and frost on the windows. It was something I used to love having when we lived up north and still enjoy. Pot pies are a great way to have a one dish meal with all of your veggies and meats in one bowl. And does anything taste better than that crispy buttery shell? I am not good at pasty dough but with this dish, I make it in a casserole baking dish and cut out the hassle of rolling and sizing the dough! This is a quick and easy dish to put together in about an hour’s time.
1 pound boneless chicken breasts
2 pounds frozen mixed vegetables
2 cups chicken broth
2 Tablespoons cornstarch
1 1/2 cup flour
1/2 teaspoon iodized salt
8 Tablespoons salted butter
5 Tablespoons water
Directions
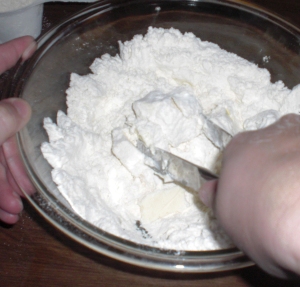
- In a large mixing bowl, sift together flour and salt.
- Add butter, by tablespoon slices.
- Using case knives, incorporate butter with dry mixture.
- On a large dry surface, dust with flour.
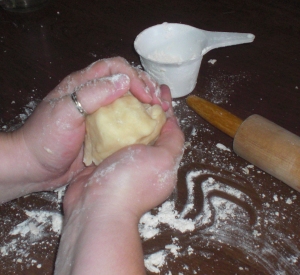
- Turn out dough and knead slightly, creating a well in the middle.
- Add 2 tablespoons of water and knead into mixture.
- Repeat well and water process until dough is manageable.
- Coat a 13 x 9 baking dish with butter.
- Press one half of dough into the entire dish, building up the walls.
- Cut chicken breasts into 1 inch squares.
- Place into a skillet over medium heat.
- Once outsides are cooked turn heat down to low.
- Pour in broth and vegetables.
- Cook until vegetables are thawed.
- Remove one cup of heated broth.
- Stir in cornstarch.
- Add remaining broth and stir well.
- Place chicken and vegetables into baking dish.
- Cover with broth mixture.
- Roll out remaining dough and lay over dish.
- Seal edges.
- Coat with melted butter and bake uncovered at 350 degrees F for thirty minutes.
Coconut Pecan Frosting
There is only one reason in my opinion to ever eat a chocolate cake – and that reason is this frosting. It doesn’t get any better than this. I like to spice my frosting up a little with some adult flavouring, and that just doesn’t blend in well if you try to add it to the Betty Crocker tubs at the store. Plus, making your own frosting is sooo much easier and on the plus side, you know what is in it.
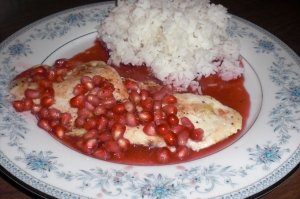
Pomegranate Chicken
According to mythology, it is due to pomegranates that we have the seasons and pomegranates in the US are exceptionally seasonal, usually from about Halloween through Christmas.
When you buy one, pick one with a firm skin like an apple, the heavier the better. They range in colours from dark yellow to bright red, but unlike most fruits, the colour really means nothing to what you will find inside. Inside the pomegranate are the edible seeds which have the consistency of a very firm kernel of corn. For my recipe I will be using a juicer, but typically you won’t. For general uses you would cut about an inch off of the top of the pomegranate and then cut through the skin only down the length of the pomegranate, cutting it into 6 to 8 pie slices and then remove the arils or seeds. You would then place them into a bowl, fill it with water, and after about an hour the membranes to discard will surface and the seeds remain.
This recipe blends the tart citrus of the pomegranate, the earthy flavour of cinnamon and the bite of garlic into a curious taste that is so lively on the tongue. The prep work involved with the pomegranates can take bit of time, but most stores will sell the arils in a separate package (check the organic or herb section of the produce area of your store) and pomegranate juice (usually with the fruit juices) but I like the fun of getting my fingers dirty. If you don’t have a juicer, use a sieve.
Egg Noodles
My grandma used to make her own egg noodles for stews and soups and I thought they were the most heavenly tasting things I had ever tasted. When I asked her to give me the recipe, she didn’t have one. So I tried to watch and learn. We laughed as I made her measure her ‘handful’ of this and that into measuring cups and I couldn’t grasp how anyone could measure like that. It’s funny, because now so many of my own creations are a palmful of this or a handful of that.
These egg noodles are a great staple for homemade chicken noodle soup or covered with Swedish meatballs or even just buttered.
Ingredients
2 cups flour, unsifted
1/4 teaspoon ground sea salt
1/2 teaspoon baking powder
4 egg yolks
Using a fork, in a medium bowl, mix all dry goods until well blended.
Add in yolks, using your fork to blend, pulling the fork through to blend the dry and moist well.
On a floured surface, turn out the dough mixture and quarter.
Using a well floured rolling pin, roll one quarter of the dough to no more than 1/4 inch thickness.
Cut into 1/4 inch strips.
* See below
Repeat process with reserved dough.
*If using immediately, add to large pot of boiling water.
*If you are making this for later use, lay a wooden spoon, dowel, or other wooden stick across a deep pot and drape the noodles over the rod to allow it to air dry. You can also use a floured cheesecloth and lay the noodles out to dry, although this method takes slightly longer. When dry, the noodles will hold their shape and have a crusty exterior. Package in an airtight container or zip lock bag and freeze. When ready to use, add to boiling water.
Cassava
This recipe came from a Filipino friend of our family when I was a kid. It is heavenly but extremely sweet. I have made it for gatherings mostly because it make so much and to eat more than like a 2 inch square is enough to put about fifty pounds on.
Ingredients
2 packages frozen shredded cassava, 16 oz each*
2 cans frozen coconut milk, 16 oz each*
1 egg yolk
2 cans sweetened condensed milk, 14 oz each
1 can coconut cream, 8 oz**
*These items can be found at Oriental grocery stores if your local grocer does not carry a variety of ethnic foods.
**Coconut cream is NOT the same as coconut milk. If you cannot find this item at the grocery stores, almost all liquor stores carry this as it is used in mixed drinks.
- Thaw cassava and coconut milk packages at room temperature for about 30 minutes before you begin.
- Preheat oven to 350 degrees.
- In a large bowl mix the thawed cassava with 1 1/2 packages of thawed coconut milk and 1 1/2 cans sweetened condensed milk. The mixture will be very thick and almost dough like texture. Spoon into a 9 x 13 glass dish, spreading evenly. Bake for 30 minutes or until a golden brown.
- While the base is baking, in a medium bowl, mix egg yolk, remaining coconut milk, remaining condensed milk, and coconut cream.
- Remove base from oven when golden brown and pour milk mixture evenly over top. Return to oven for 15 minutes or until a nice medium brown.
- Cut into 1 – 2 inch squares while still warm.
It can be served warm, but I think it is better when cooled.
Gator Hammock Substitute
It isn’t the same but it’s fairly close:
1/8 cup garlic salt
1 package dried taco seasoning
1 Tbsp cumin
1 Tbsp cracked pepper, I use the blended type
1 Tbsp sugar
- Mix in a plastic bottle thoroughly. It will be very coarse.
Mash
A couple years ago for Saint Patty’s Day my daughter wanted me to go all out, a full authentic Irish meal. So, since I don’t typically cook meals from places that far north, I had to go digging for recipes. Don’t get me wrong, I enjoy eating everything from corned beef to Sheppard’s pie but most everything I knew of was a variant on cabbage or potatoes. In doing so, I opened my mind to some ideas that have uncreative names and sound rather bland. And truth be told, they aren’t the type of meals you want to make because they display nicely. But hearty and filling they are, these are the meals my grandma had in mind when she used to say I should eat up so it would stick to my ribs.
This particular recipe is basically mashed potatoes with a sweet side. I’ve played with this a few ways and have yet to find a way to make it visually more appealing. The apples get a brownish colour and adding the old standby of lemon juice alters the flavour too greatly. Anyone able to find a work around, please feel free to let me know.
And before we start, the age old question is which apple is best? I prefer Fuji or Delicious for cooking as these tend to retain a lot of the flavour. If you like a bit of a bite with your apples, go with Granny Smith apples. A lot of people swear by Macintosh, but I find when I cook with them they seem to lose a lot of flavour. Ultimately, it comes down to personal choice, just remember that the apple that tastes great raw may not taste the same at all when cooked.
Ingredients
3 – 4 good sized apples, peeled, cored and chopped
2 pounds potatoes, peeled and quartered
4 Tablespoons butter
1 Tablespoon granulated sugar
1 teaspoon iodized salt
2 Tablespoons water
- In a large pot over medium heat, place potatoes and salt in and cover with water. Bring to a boil and cook until tender.
- In a separate pot over low to medium heat, cook chopped apples with 2 Tablespoons of water and sugar. Stir constantly until tender.
- Drain potatoes and place in a mixing bowl, beating on slow speed with electric beater, or using a handheld potato masher.
- Add in soft cooked apples and butter, mash thoroughly to blend.
- Serve warm.
Raspberry Tarts
Tarts are typically an open faced pie, no top, and most generally have fruit with a custard type filling; not to be confused with torte, which is a European cake. They are historically a British dish, though they have found themselves on the menu of many restaurants across the world. Random trivia for your guests: What was believed would happen to you if you ate a tart made by a witch? Answer: You’d become mean.
If you have used my recipes in the past you will know I don’t do pastry breadings – not pie shells, puffs, dough, etc. I fail at it. So for this recipe I use pastry puffs which you can buy at your local grocery. You can also layer phyllo dough in a well buttered dish, or use a flaky deep dish shell. This recipe will fill about 18 pastry puffs – so you can cut it down if you need to pretty easily to 6 puffs.
There is nothing I love more in the fruit department than raspberries, their smell, their taste, their everything. And while you can make this recipe with just about any fruit you desire – strawberries, cherries, rhubarb, blueberries, blackberries, peaches – I love raspberries. And the only thing that trumps raspberries is raspberries with cream cheese. You can serve this as a dessert, snack or even as a breakfast dish.
Ingredients
8 ounces cream cheese, softened to room temperature
1 cup granulated sugar
4 eggs
1 1/2 cup half & half cream
3/4 teaspoon vanilla extract
1 cup fresh raspberries, rinsed
- In a large mixing bowl, beat cream cheese at medium to high speed for 2 minutes, scraping walls.
- Add in sugar slowly, beating at a high speed until well blended.
- Add in eggs, one at a time, continuously beating.
- Add in vanilla and cream and beat at high speed for 2 minutes more, scraping walls.
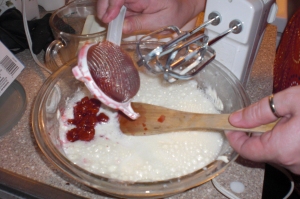
- In a small saute pan or skillet over low heat, warm raspberries, shuffling often in pan. Be careful not to stir them as they can break up. Heat only until they begin to bleed and remove from heat.
- Strain raspberries well and fold into cream cheese mixture.
- Discard raspberry juice.
- Pour mixture into prepared puffs*.
- Bake at 350 degrees F for about 20 – 25 minutes, until toothpick comes out clean.
*Puffs should be baked in advance to a golden hue, just barely crisp. Cool them at room temperature or even for fifteen minutes in the freezer if you are under the gun before you pour the filling in. Otherwise the cream cheese mixture may crack and separate from the shell.
Kiwi Lime Cheesecake
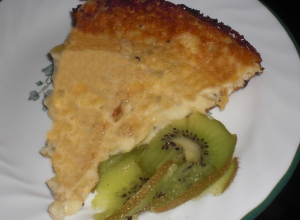
This was my final fling of summer. I caught a great deal on kiwi fruit at the grocer and kind of needed a means of getting rid of them all. So I present to you a kiwi lime cheesecake. It turned out a bit bland in colour, so you might want to add a drop of green food colouring to yours to liven it up, but I thought about that a bit late in the game. This turned out with the citrus tang of a key lime pie but the kiwi mellowed it out slightly.
One of the biggest problems with baked cheesecakes is the cracking. There are a few tricks to prevent this. Firstly, the most critical part is beating. You want to smooth out the creams very well before adding the eggs. Use the back of a spatula after beating with a mixer, pulling the cream from the centre and then pressing against the sides of the bowl. When you add the eggs, they should be your final step and blend them in by hand. If you beat them with the mixer you run the risk of bringing too much air in and then you get air pockets. Also, make certain you really prepare your springform pan with plenty of grease or butter or spray. If the sides of the cake while cooking are able to pull away from the pan, that will reduce the risk of it cracking in the centre. Lastly, I use two different sized springform pans. The larger one I fill with water once my batter is in the smaller pan. The water helps keep the oven humid and makes the cake cook evenly.
2 cups (16 ounces) cream cheese, softened (not the whipped kind, it is too airy)
2 cups whole milk ricotta cheese
1 cup sour cream
2 cups granulated sugar
1/2 cup flour, unsifted
5 eggs, room temperature
4 kiwis
1 lime
1 Tablespoon vanilla
Directions
- Preheat your oven to 350 degrees F.
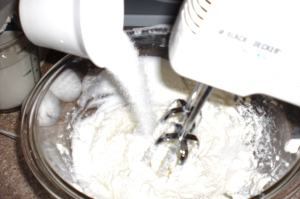
- In large mixing bowl, beat the cream cheese, sour cream and ricotta until well blended.
- Add flour and sugar and beat at a medium speed until mixed thoroughly.
- Cut kiwis in half and set one halve aside.
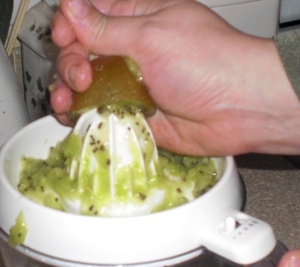
- Juice remaining halves, allowing for pulp, but no skin.*
- Halve the lime and juice one half. Set aside the remaining halve.
- Add vanilla and lime to kiwi puree and fold into cream mixture using a spatula.
- Break eggs into a separate bowl and beat with a fork only enough to blend yolks.
- Fold eggs into cream batter.
- Heavily butter the walls of a springform pan or round cake dish.
- Pour in batter.
- Set springform pan or cake dish into a larger dish. Fill larger dish halfway with water.
- Bake for 45 to 50 minutes. The centre will be slightly jiggly, but remaining cake will be firm when ready.
- Remove from heat and allow to cool at room temperature for at least one hour before chilling.
- Slice remaining lime and kiwi for decoration.
- Serve chilled.
*I used the juicer for the kiwi puree as it worked better than trying to skin them and then puree the meat of the fruit.
Gnocchi alla Cannella
I love the unique flavour of gnocchi, which is kind of comical because I avoided eating it for several years, mostly because someone had described it as tasting like pierogis, which I really am not a fan of. But truth be told, the similarity stops at potatoes. They are very light in texture, it’s difficult to put into words – but they are very tender and airy.
You can use either my recipe for homemade gnocchi, or store bought gnocchi. Gnocchi is very light and this sauce blend is not overly sweet so it works well as a unique side dish or a dessert. You want to make the sauce promptly before serving or it will crystallize as it cools, and gnocchi become chewy if cooked too long or reheated. The preparation time for this is only about five minutes, so you can easily make this up while the dinner dishes are being cleared.
Ingredients
Gnocchi (either 1 package of prepared gnocchi or one single batch of my recipe)
1 stick unsalted butter (note that I didn’t say margarine)
2 tablespoons cinnamon
1/2 teaspoon paprika
2 tablespoons sugar
Directions
- In a skillet over medium heat, melt butter.
- Add cinnamon, paprika and sugar to melted butter mixture and whisk til blended.
- Remove from heat.
- Boil gnocchi 3 – 5 minutes, until it floats. Remove as soon as they float to surface!
- Drain and add sauce mixture to gnocchi.
- Serve warm.


Cannellini Beans & Sausage
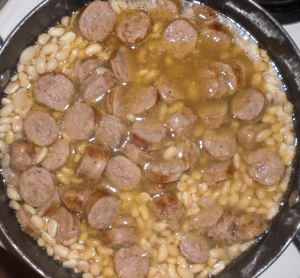
This is one of those great dishes you can slave over all day long or simply toss into a crock pot and let it cook while you slave away at work all day. This turns out to a thick chowder consistency and is absolutely wonderful on a cold day. If you can’t find cannellini beans at your local store you can easily substitute with northern white beans.
Ingredients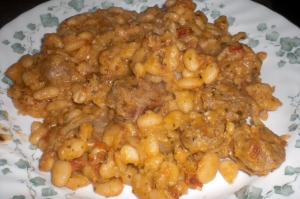
3 cups dried cannellini beans, rinsed
2 Tablespoons olive oil
1 teaspoon sea salt
1 cup pesto
6 oz. pureed tomatoes
1 – 2 pounds Italian sausage links
5 Tablespoons salted butter
2 – 3 cloves garlic, pressed
Directions
- In a large heavy pot over low heat (or in a crock pot set to low) add olive oil and salt.
- Add in dried beans and 5 cups of water.
- Cook until beans are tender. Over stove this is 2 – 3 hours, in crock pot 4 – 5 hours.
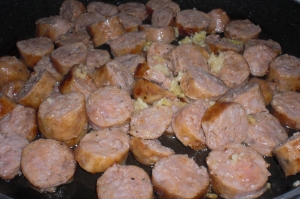
- Brown sausage in a skillet over medium heat.
- Slice to 1/2 inch thickness and return to skillet, browning on each side.
- Add in garlic and cook for five minutes over medium heat.
- Add sausages to beans, increase heat to medium and cover.
- Blend tomatoes with pesto.
- Drain beans thoroughly and add butter.
- Blend in pesto and serve.
